
Improve your mic’s quality with these OBS settings!
Do you want to know how to improve the quality of your streaming audio? You don’t need a big budget to sound like a pro, just the right OBS microphone settings. Even if you’ve paid only 15 bucks, these tricks will make the most out of it.
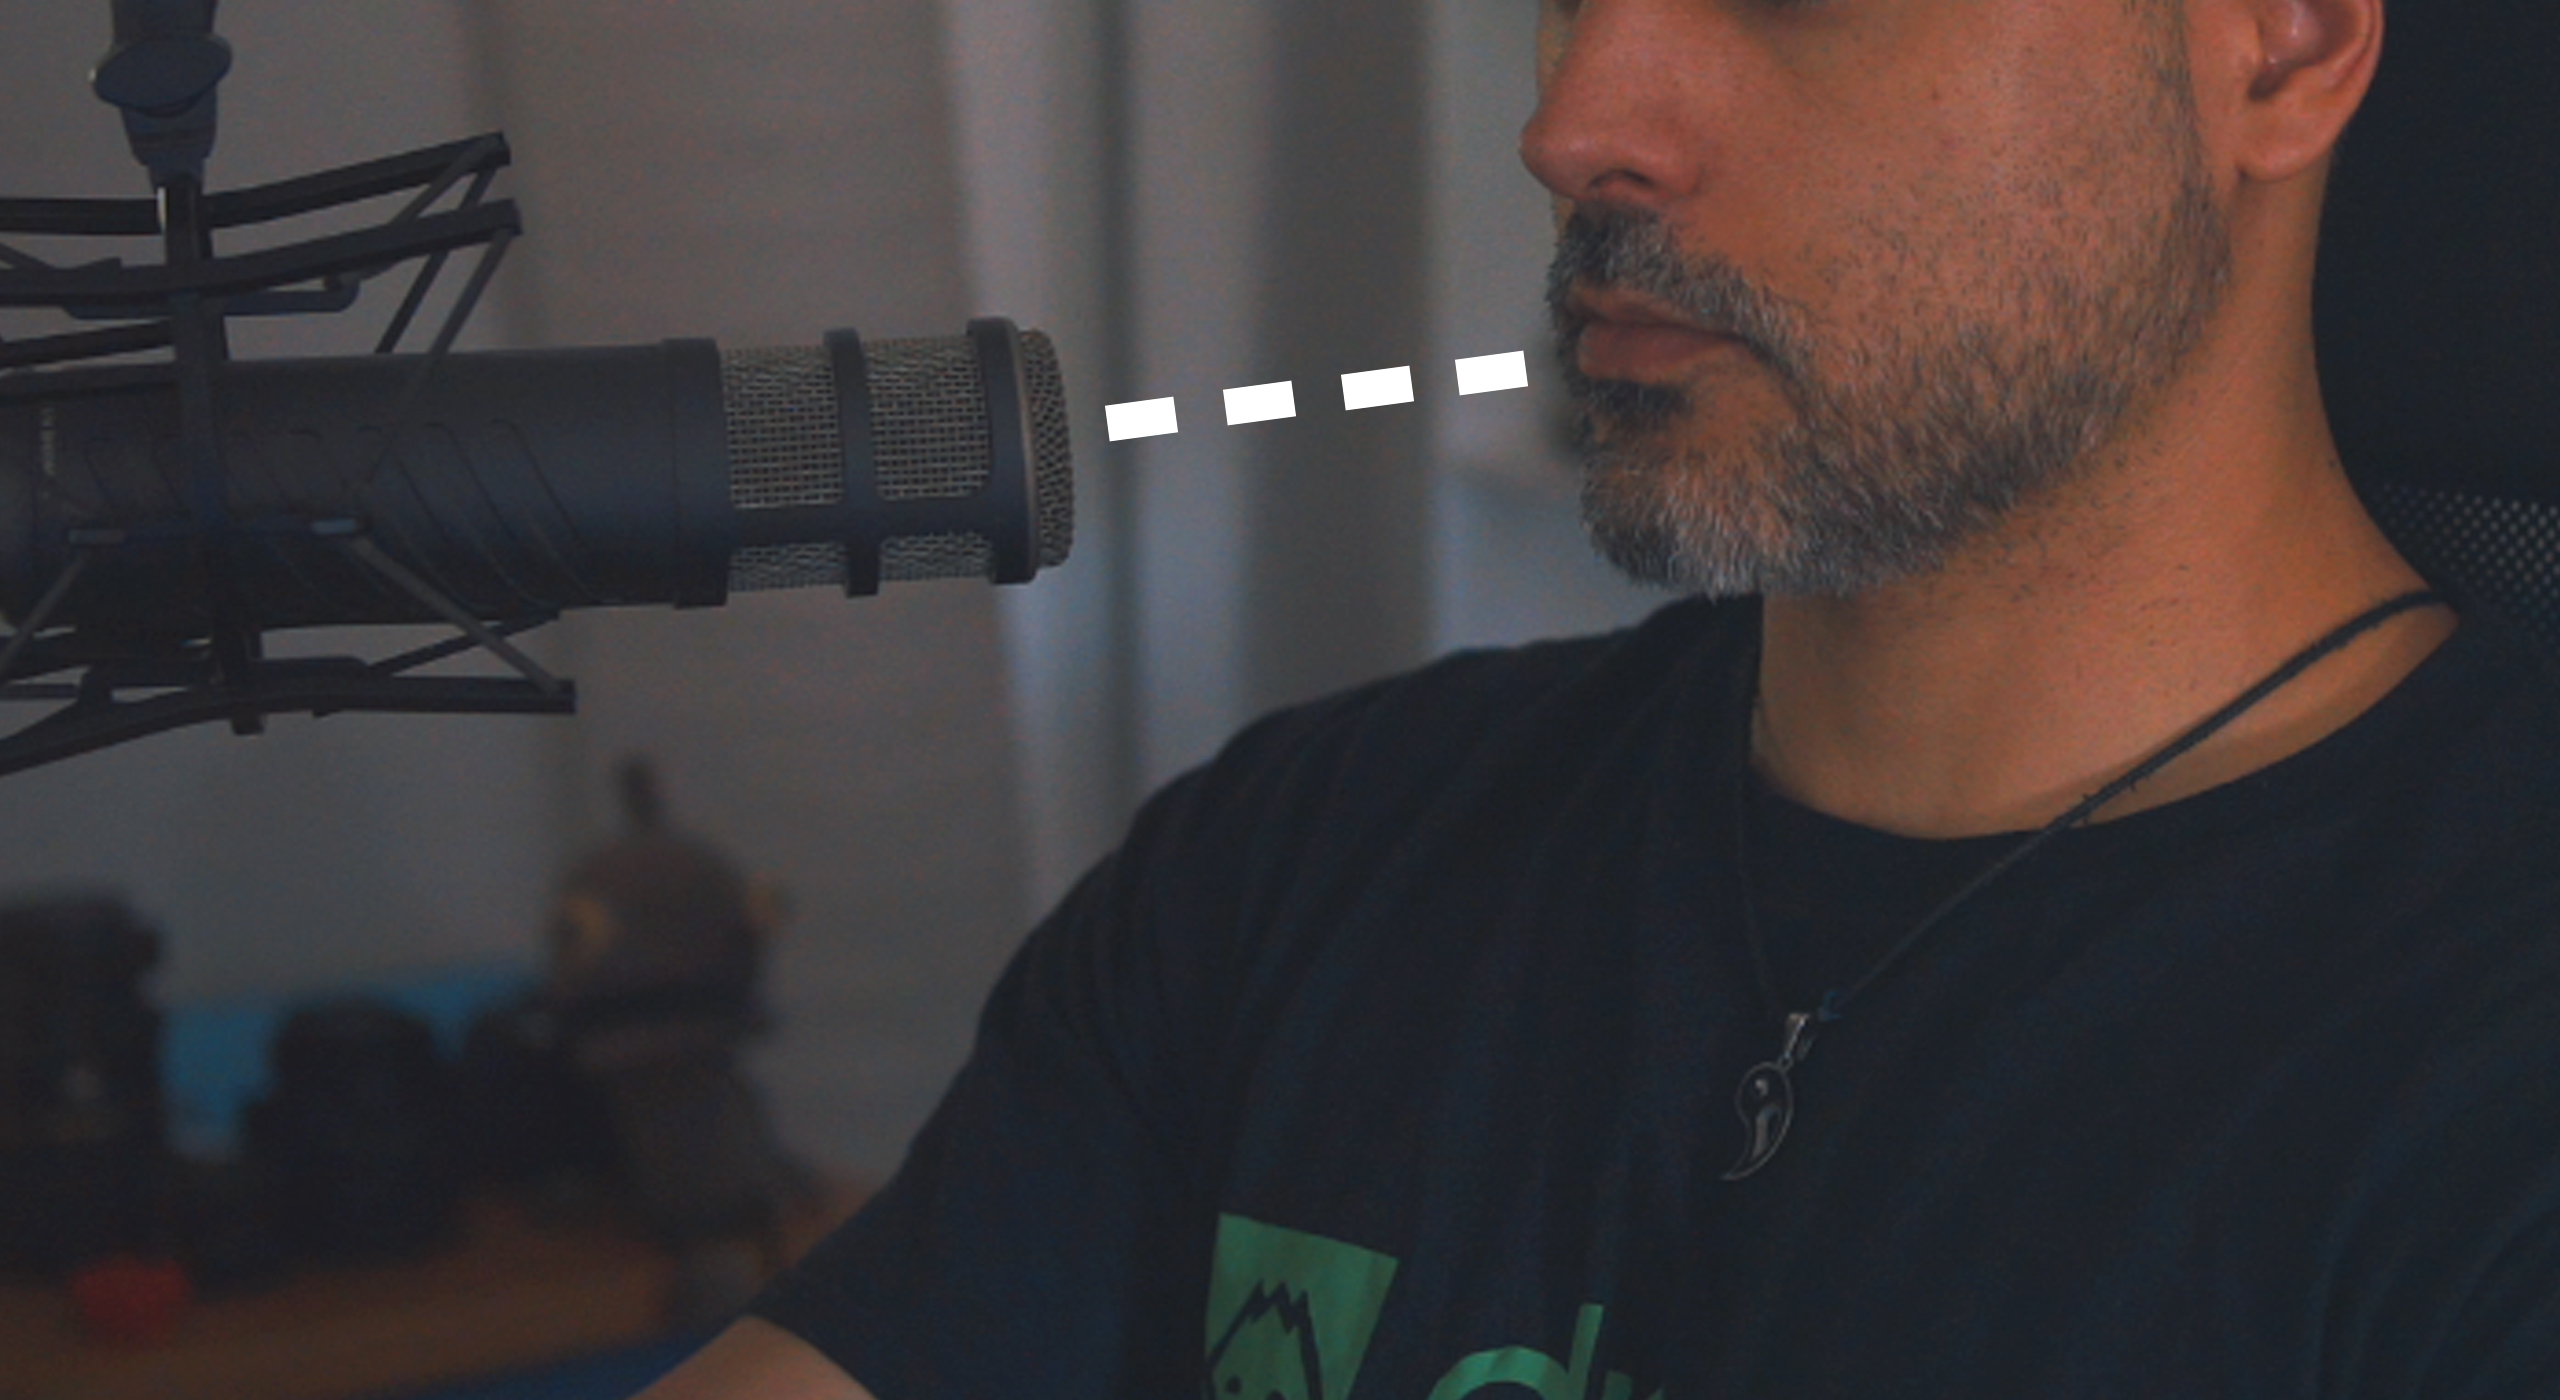
First, put the mic in the right place
Just as we said in our previous post about how to improve the quality of your webcam, the position of your mic does make a difference. Make sure that there is the right distance between you and the device, so it picks up your voice, and it does not sound saturated.
To check this on OBS, verify that this bar in red is never fully complete. It is very important that the audio has no peaks to have a decent quality. In any case, we will now show you how to avoid it.
Which plugins are we using in the OBS settings of your microphone?
- ReGate will help you to place a noise gate. It will prevent the natural noise in our room or that our microphone produces from being attenuated during moments of silence, which is when it is most noticeable.
- ReaEQ-Standalone, an equalizer with which we will control the low, medium, and high frequencies to enhance those parts that most interest us.
- Gain will allow us to increase or decrease the volume of our microphone to avoid what was mentioned in the previous section.
- The limiter is a very interesting filter or plugin that will prevent the clipping (saturation) of our microphone even if we shout.
Plugins used in OBS to help you improve your mic quality
We are going to work with some VST plugins that are very easy to install.
- You can download them here.
- You should include them in the folder “Raid Plugins OBS”.
- Once installed, let’s go back to the microphone, then filters, and click on ‘more’ where you will see the extension VST 2. Click on it.
- Go to the noise gate to prevent the ‘fff’ background sound whilst you aren’t speaking. Play with the parameter at the left until you like the professional result you are looking for.
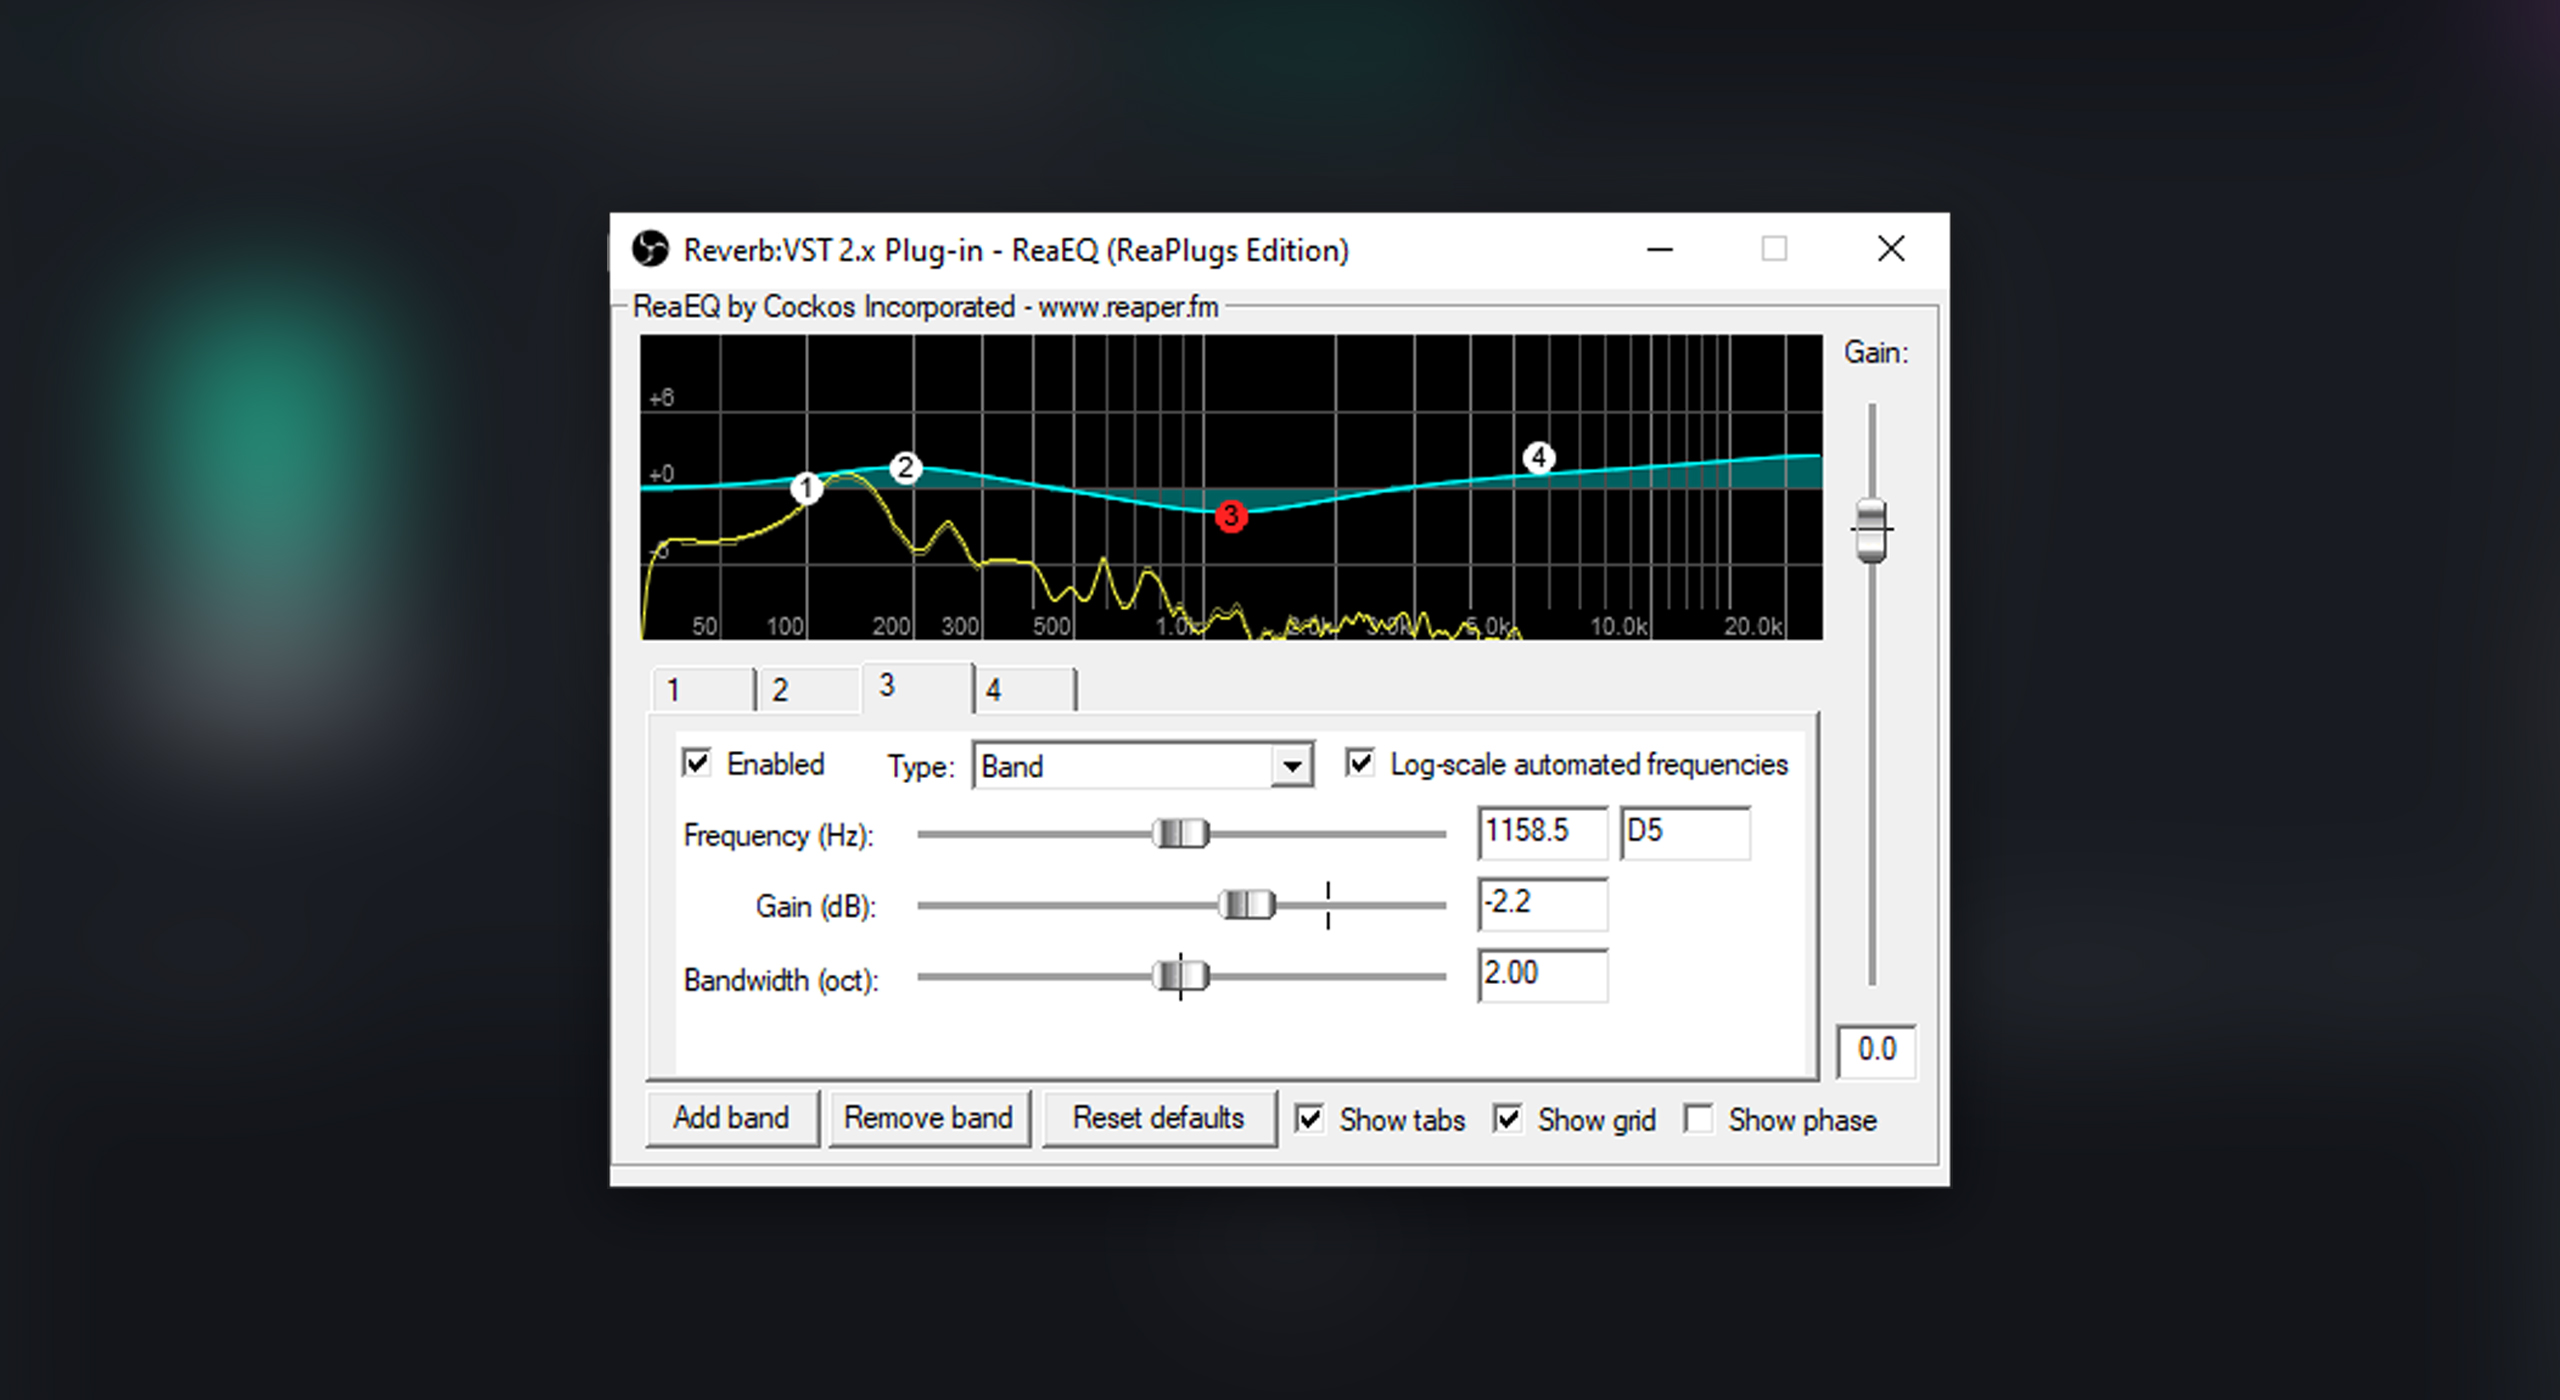
Best OBS settings for a microphone: how to work on your equalizer
When taking the most out of our OBS microphone settings, equalizers are crucial. Let’s start the same way as we did before with the noise gate:
- Go to “Filters” and click on “More”.
- Include the plugin ReaEQ Standalone.
- Play around and find the configuration that suits you best.
Earlier we’ve seen that it was important for the audio not to peak, or not turn red. If we add a limiter on the microphone by simply clicking on “More” and managing the threshold, we will prevent the audio from going too high.
And, that’s it! It won’t take you too much time. With these three or four plugins and the tips on OBS settings for your microphone, you will have everything you need to make it sound as professional as possible.
But hey! A professional setup is not only made by having a good sound, remember that your cam should work perfectly as well.
Don’t worry, we’ve got you, check this blog to know how to improve the quality of your webcam.