
Live
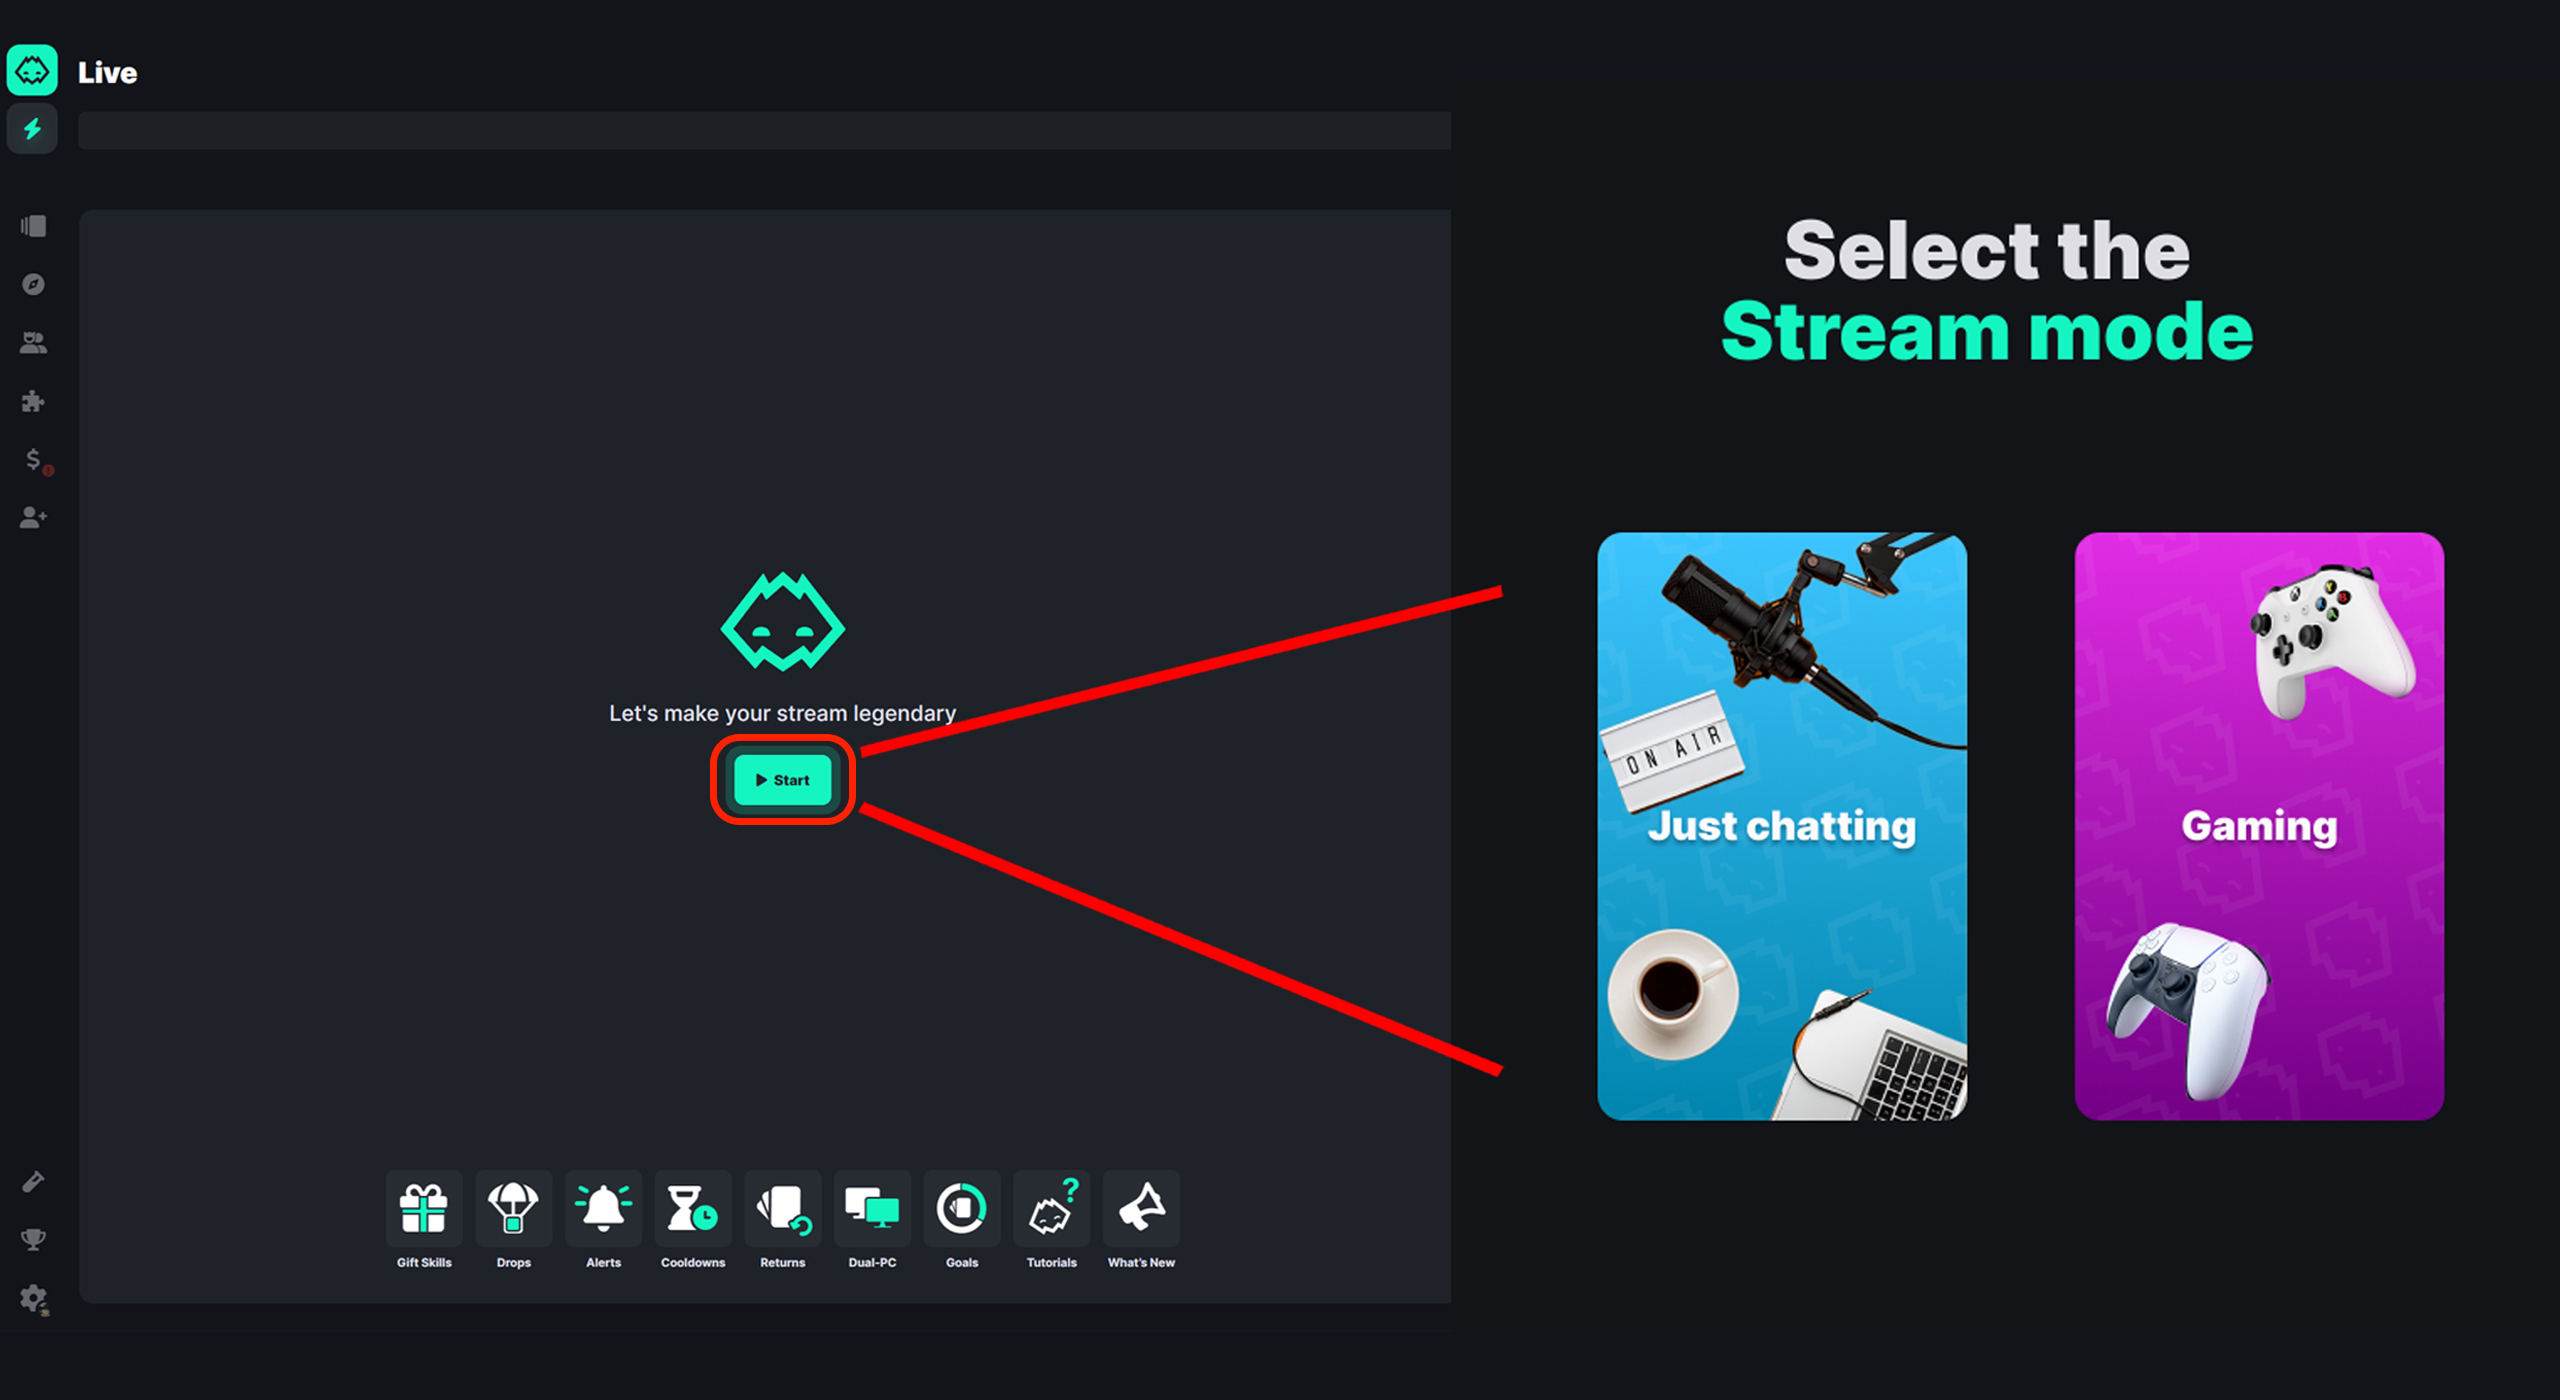
6This is the first window we will see once Dixper Studio is started. In the first box we will have the link to our Dixper profile, (https://dixper.gg/username) link that we will have to share with our community so that they can access the box panel to launch skills.
To begin we click on “Start”.
In the next window we will have to select the type of content that we will stream in Twitch:
- Just Chatting: stream focused on chatting with the viewers in a full-camera scene.
- Gaming: stream in which the chosen game plays a major role.
Just Chatting
If we select the “Just Chatting” option, we will have to wait for no longer than 30 seconds for Dixper Studio to sync with our broadcasting software.
Gaming
If we select the “Gaming” option, we will have to start the video game and wait no longer than 30 seconds until Dixper Studio syncs with our broadcasting software.
My Collections

In the “My Collections” window you will always be able to add one of Dixper’s collections or create your own.
Click on “Create Collection” and, this time we will focus on “Create collection from a game”.
In the following window we can search for the title of the video game we want to stream if it’s not in the list, we also have generic collections such as “Terror 2022”, “Just Chatting” or “Voicemod“.
Once you have selected the desired collection, click on “Add”.
Widgets

In the “Widgets” tab you will find different tools that will help you with the sale of crates in your streams.
This time we will focus on “Alerts”.
Alerts
In the “Alerts” tab we can configure Dixper’s overlay that will display on the screen the name of the person who has launched the skill, the time left to finish and the users who are in the squad (if any).
In the settings we can change the colors, fonts and elements displayed on the screen.
To add it to our streams:
- We copy the url from the “Add to your OBS” section.
- In our OBS, Streamlabs OBS or broadcast software we will have to add a browser source and include this link.
Goals
In the “Goals” tab we can set a numerical goal for skill casting or for crate sales.
In order to add it to our streams we will have to create again a browser source and include the link under the text “Add to your OBS:”.
You will be able to choose between different designs, some of them only unlockable during Dixper events. In the “goal properties” section you will have the option to change the different colors that compose the widget as well as the initial value of the goal and the target to reach.
Bot
In the “Bot” tab we will be able to configure a personal bot that will remind the chat about the user link to access the crates’ panel and to launch skills during the streams.
We will have to make the Dixper bot a moderator by typing “/mod Dixperbro” in the chat of our Twitch channel.
In the “General” tab we will configure the messages that will appear, such as the skill activation message, the name of the user who has bought a crate, or the name of the user who has giften a crate in the chat.
In the “Commands” tab, we can configure different shortcuts for users. Following the default example in Dixper Studio: whenever a user types “!Dixper” in the chat, the message described above will appear.
In the “Timers” tab we can program a bot to write in the chat at the interval we want and with the message we want.
How to create a new skill and personalized collection
Create a Collection
In the “My collections” window, click on “Create collection” and then on “Create custom collection”.
In the next window we can choose the name and logo that will compose the collection. Once the customization is finished, click on “Create collection”.
Create a Skill
Once the custom collection has been created or one of those offered by Dixper Studio has been imported, open it and select “Create or import Skill”.
In the next window select “Create your custom skill”.
We will have access to the Wizard, an assistant that will help us in the creation of skills by selecting among the different stream categories.
Click on “advanced user” to create one from scratch.
In the “Skills Editor” we will be able to:
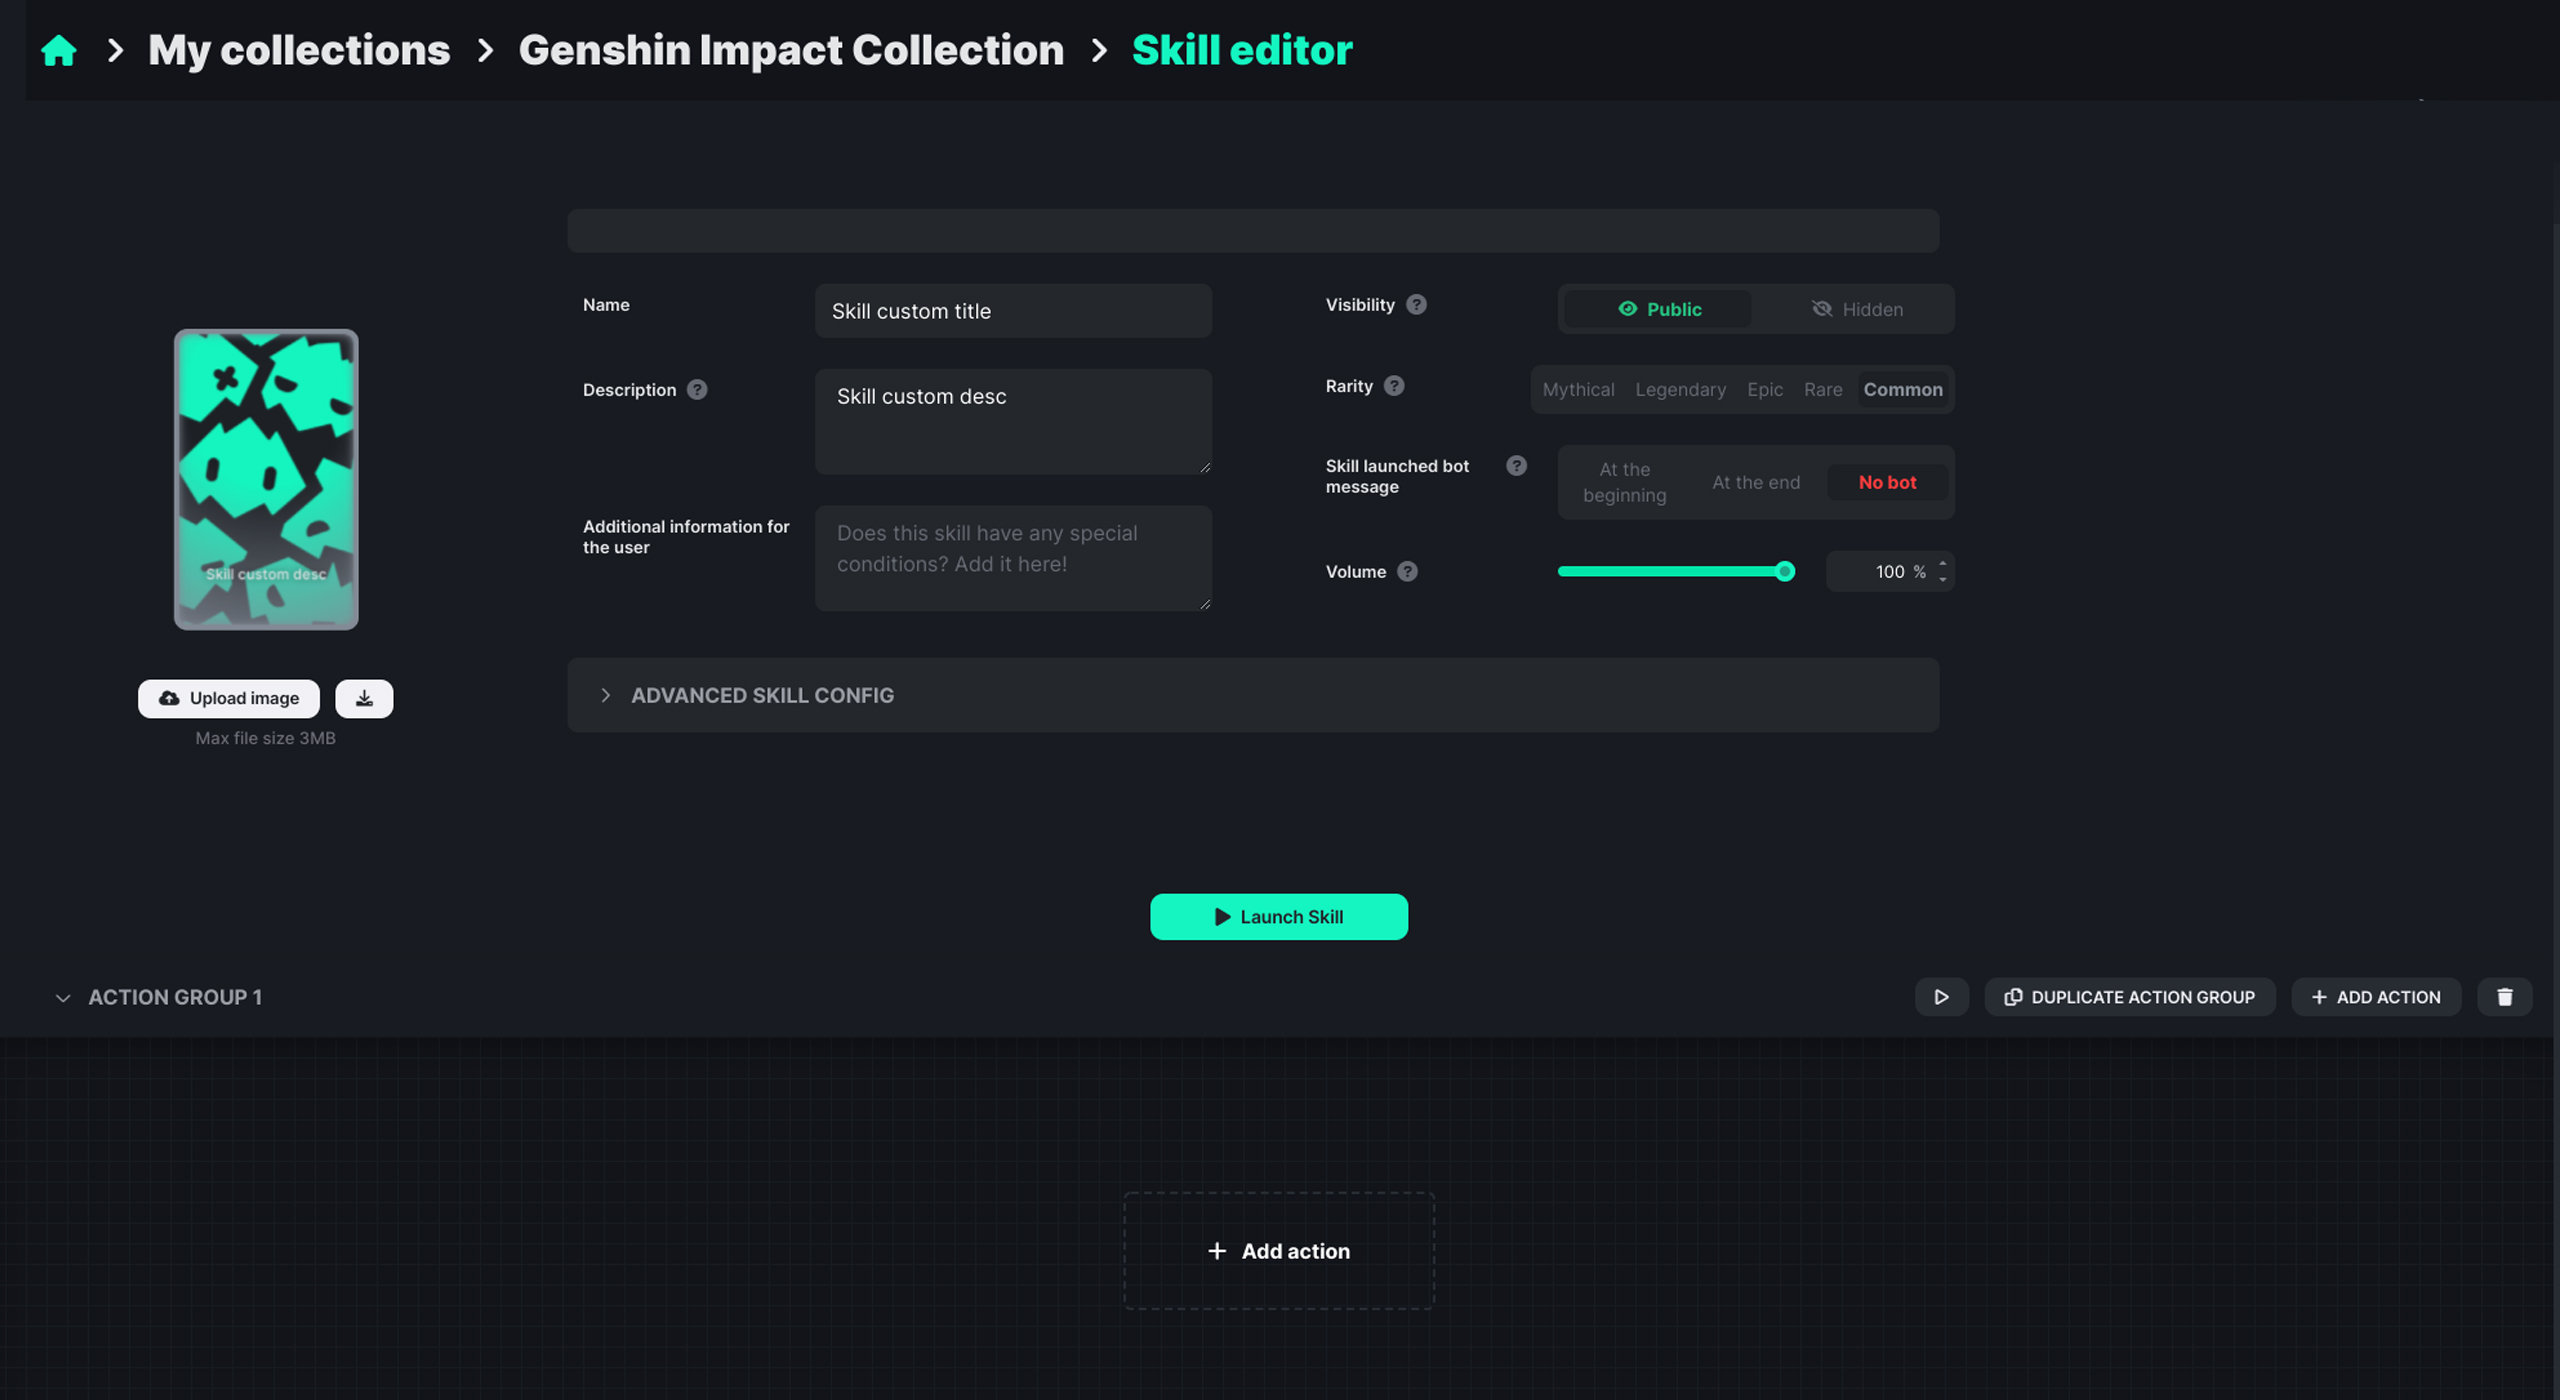
We can always test the skill at any time with the “Launch Skill” button.
Dixper’s Direct Accesses
In the “Live” shortcut bar we will have access to different functions offered by Dixper Studio.
- Gift Skills: Give skills to your channels’ most loyal subs.
- Drops: Create a crate drop link for your community.
- Alerts: Configure Dixper’s skill drop alerts in your broadcasting software.
- Cooldowns: Change the waiting time between skill launches.
- Returns: Returns launched skills.
- Dual-PC: Enable the Dual-PC option if you use two PCs to stream.
- Goals: Set a goal and multiply the growth of your channel.
- Tutorials: Access Dixper tutorials to learn how to get more out of the platform.
- News: Find out the latest news and updates in the Dixper community.
Moderators
In the “Moderators” tab we can grant special permissions to chosen users (among those who have entered our Dixper’s profile).
These permissions include blocking a user’s access to our streamer account or giving away crates.
To grant a moderator rank to a user we must select his name from the list or search for him in the top bar. Once selected click on the “Make moderator” button.